uPVC windows (unplasticized polyvinyl chloride) enjoy great popularity in modern Saudi homes for several reasons; including good thermal insulation and long service life.
These wonderful windows retain heat inside the building better than traditional wooden frames; thanks to their high thermal resistance, and they are also more stable and their dimensions don’t change with seasonal variations of heat, cold, dust, and humidity!
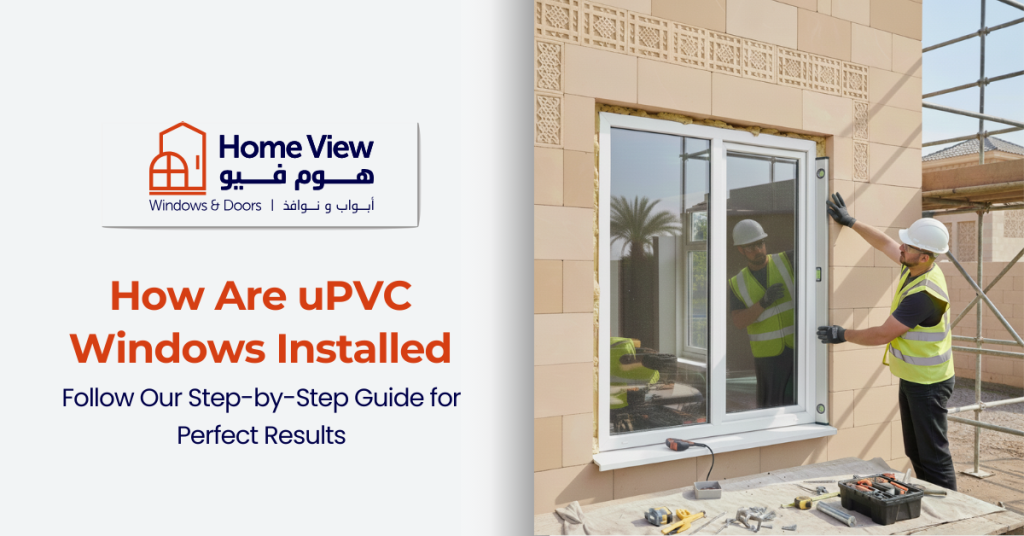
In this article from HomeView, we will detail how to install uPVC windows with a practical guide on implementation steps, step by step!
Preparing for uPVC Window Installation
To begin installing uPVC windows, you must first prepare the required tools, measure the opening accurately, then remove the old window, after which you install the new frame and execute the final insulation.
1- Gathering the Necessary Tools and Materials
- Spirit level, minimum 60 cm.
- Electric drill with drill bits.
- Assorted screwdriver set.
- Wooden wedges for adjusting and temporarily securing the frame.
- Sealant or waterproof and insulating silicone (one cartridge or silicone tube).
- Plastic wall plugs and fixing screws (special wall anchors).
- Damp-proof course materials (DPC).
- Concrete mortar or cement mixture for fixing between the frame and wall.
These tools and materials help complete the installation accurately and safely.
2- Measuring Window Openings
Start by accurately measuring the height and width of the existing wall opening. It’s preferable to measure the dimensions of the old window first, then compare the dimensions of the new window to ensure size compatibility.
It’s also important that the wall openings are approximately 10-15mm wider than the new window frame. This additional margin allows for adjusting the frame to the appropriate level and adding insulation materials later. After measuring, clean the surrounding area and remove any obstacles or decorations that might hinder the installation.
» You May Also Be Interested In:
Comparison Between German, Turkish, and Chinese uPVC Windows: Which Is Best?
3- Removing the Old Frame
In this stage, the old window will be completely disassembled, as follows:
- Initially, cover the area around the window with protective covers (insulating sheets) to prevent dust and debris from spreading inside the room.
- Then use a screwdriver to unscrew the movable elements in the frame and move them gently (such as the openable parts).
- Start by removing the glass from top to bottom gradually.
- Pay close attention to your safety when handling glass and its sharp shards; it’s best to work from inside and avoid working outside as much as possible.
- If there are any interior beads or stop pieces, keep them for reuse when installing the new frame.
- After removing the window glass and the old frame, thoroughly clean the window opening of any remaining plastic or other leftover materials.
4- Installing the New Frame
a- Positioning and Adjusting the Frame
- Initially, place the sill at the base of the opening, then carefully insert the uPVC window frame into the opening.
- Use wooden wedges to fill the small gaps around the frame (usually on the bottom edge and sides).
- Temporarily secure the frame in its correct position.
- After placing the frame, use a spirit level to verify that the window frame is completely level.
- Ensure the frame is vertical and straight from all sides before final fixing.
- Accurate level adjustment helps with easy opening and closing of the window later, and limits uPVC window installation mistakes such as frame misalignment issues.
- If necessary, add or move the wooden wedges until the frame becomes completely level.
» Learn More About:
uPVC Window and Door Accessories
b- Final Fixing
- Once you confirm the frame is level, begin the process of fixing it to the wall by drilling holes in the frame and on the supporting structure behind it at regular intervals.
- It’s preferable to place fixing screws on each vertical side of the frame (top and bottom), with additional screws at the sill if the window width is large.
- After drilling the holes, place the plastic wall plugs inside the wall, then install the screws and gradually tighten them through the frame.
- While tightening, use the level again to verify that the frame is still level, and avoid over-tightening the screws so the frame doesn’t deform.
- When you fix the screws, the frame begins to take its final position in the opening.
5- Insulation and Final Finishing
- After fixing the frame, all gaps around it must be sealed with insulating materials to prevent air and water entry.
- Place a damp-proof course (DPC) along the base of the frame where it meets the wall.
- Apply concrete mortar over it to create an insulating layer that prevents water leakage.
- Seal the gaps between the frame and wall using waterproof silicone or insulating foam; run the silicone cartridge continuously around the frame edge from outside to form a tight seal.
- After that, insert the glass units into the window frame: place supporting glazing packers under the glass-bearing frame, then carefully lower the window glass into place.
- Snap the glazing beads around the glass from top, bottom, and sides to secure it firmly.
- Inside, you may need to reinstall finishing pieces, or install plasterboard, or frames to aesthetically close the gaps around the frame.
- Also ensure to clean any remaining silicone or dirt, and be sure to remove the protective tape from the frame after completion.
6- Final Inspection and Tips
- Finally, test the window operation thoroughly: ensure it opens and closes smoothly, and that the locks work correctly.
- After installation, apply a final layer of silicone on the outer edges of the window to prevent air leakage.
- Common mistakes include rushing through these steps or neglecting accurate level adjustment, which may lead to a number of common uPVC window problems in the future.
- It’s also recommended to use appropriate screws and plugs for the wall type (brick, block, or stone) to avoid frame movement or insulation failure over time.
- If you’re not confident about doing the installation yourself, relying on a professional installation company provides additional guarantees and an experienced team that handles advanced technical details.
Frequently Asked Questions About uPVC Window Installation
Can uPVC windows be installed without a specialized technician?
Theoretically yes, but practically it’s not recommended; as installing uPVC windows requires high precision in leveling and insulation, and any small error may lead to air or water leakage later.
How long does it take to install one uPVC window?
Usually, installing one window takes between one to two hours depending on its size and the condition of the opening and wall.
Does uPVC window installation differ from aluminum?
Yes, uPVC windows require greater care in installation and insulation because they rely on a plastic frame rather than metal, but in return they provide better insulation.
Does uPVC window installation affect thermal insulation?
Yes, directly. Correct installation ensures maximum benefit from thermal and acoustic insulation, while incorrect installation causes the window to lose its primary advantage.
Do uPVC windows need maintenance after installation?
uPVC windows don’t need complex periodic maintenance, just cleaning the hinges and glass and checking the silicone periodically.
» Also Read About:
How to Choose Suitable uPVC Windows for Your Home
Conclusion
By following these steps and being careful about precision in measurement, installation, and insulation, you can successfully complete the installation of uPVC windows with high efficiency, ensuring good window performance and excellent building insulation in the future. Make the right decision and HomeView experts will be happy to provide you with free consultation. Welcome to contact us.


